How to install Facebook pixel on your WordPress website or page
To manually add the Facebook Pixel to WordPress in two steps:
- Create a new Facebook Pixel via Facebook Ads Manager (you will need a Business Manager for this)
- Insert the tracking code from that Facebook pixel into the <head> section of your WordPress website
Step 1: Create the Facebook pixel
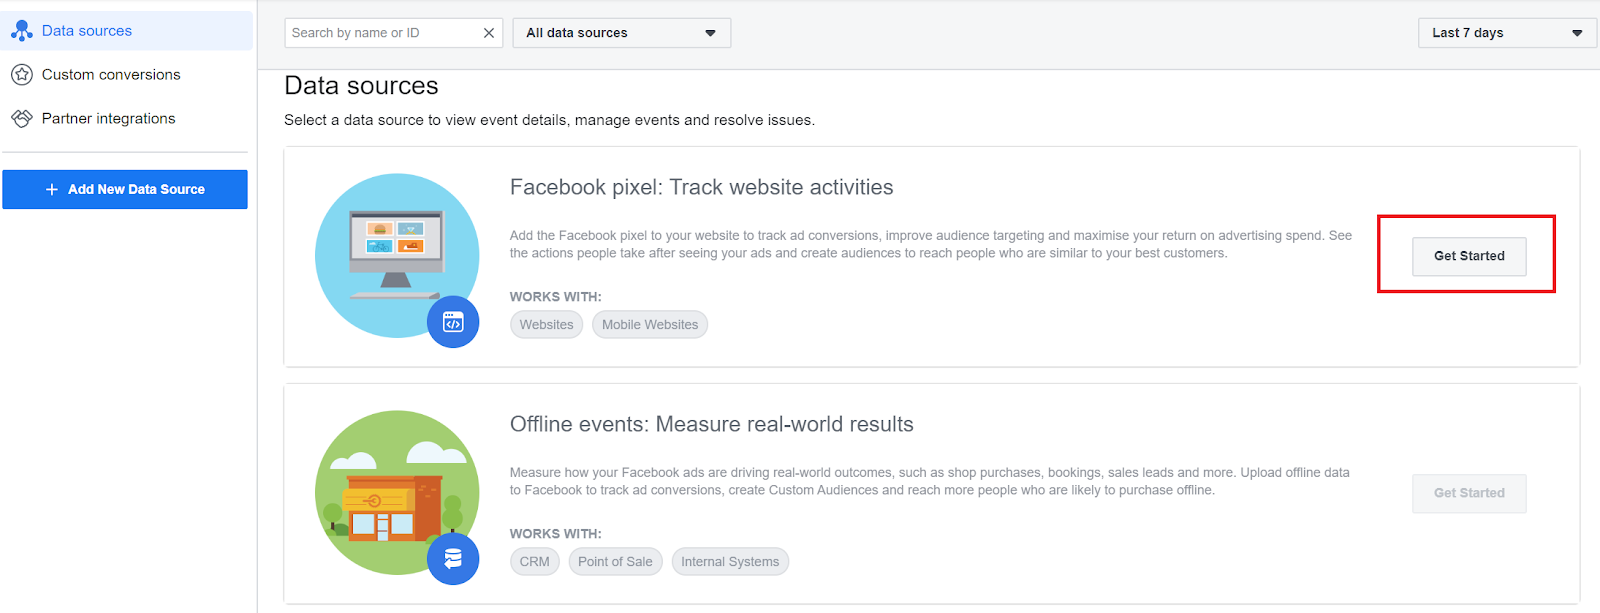
To get started, go to the Event Manager tab in Facebook Ads Manager. You can go straight there by clicking this link.
If you haven’t already created a Pixel (you can only create one Pixel per account), click the green “Get Started” button to Create a Pixel:
A box should appear that asks for a name – then simply click Create.
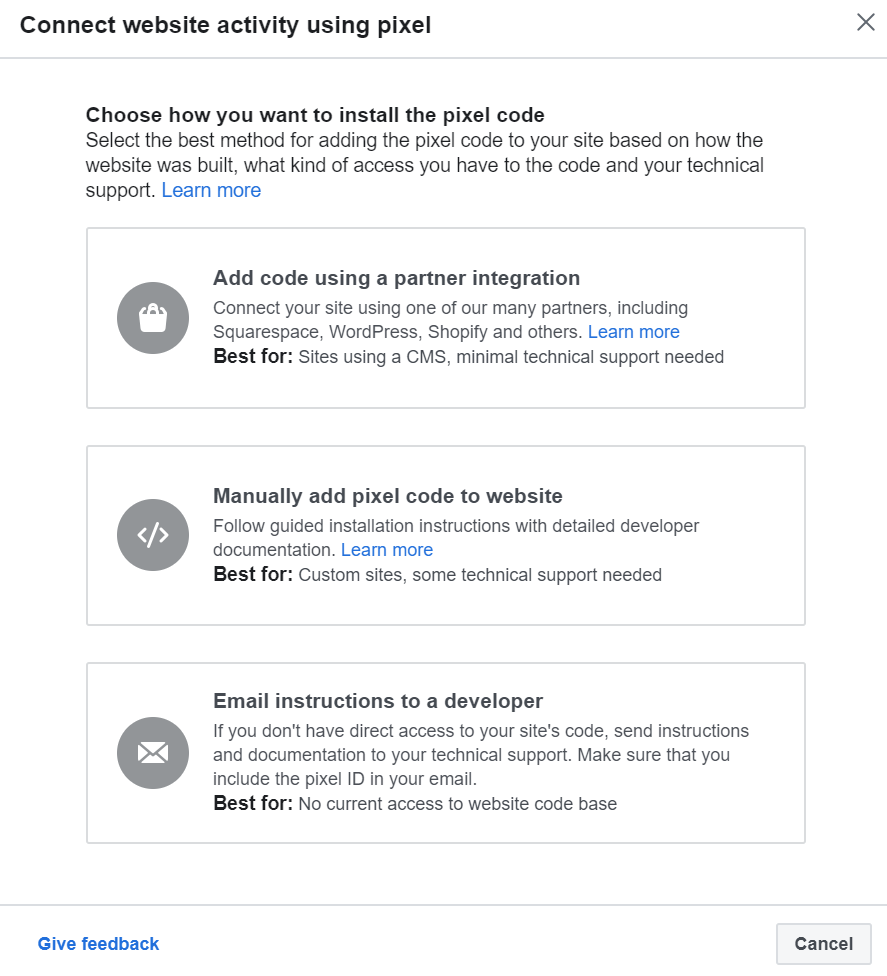
After that, you should see some options for how to add the Facebook pixel to your website.
Choose the Manually Install the Code Yourself option:
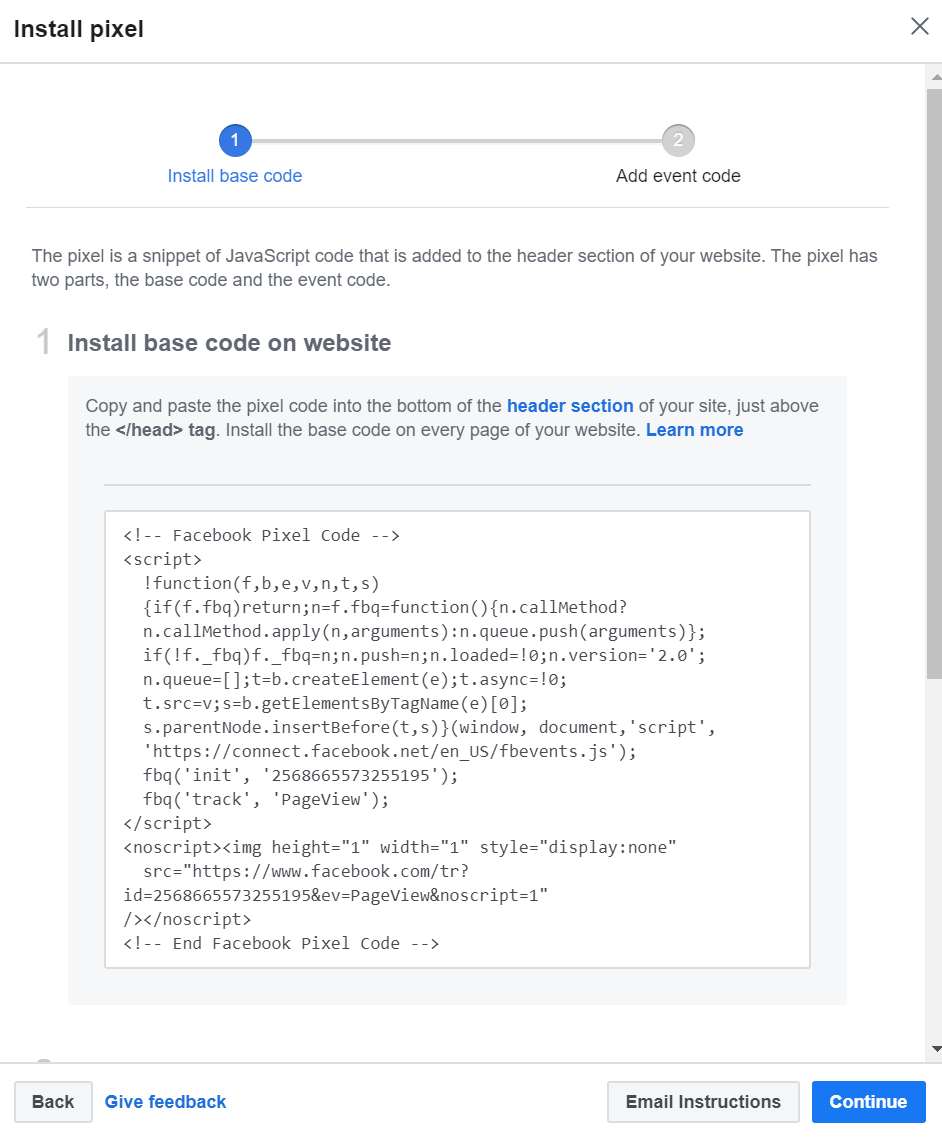
This should display the Facebook Pixel tracking code:
Step 2: Add Facebook Pixel tracking code to WordPress <head> section
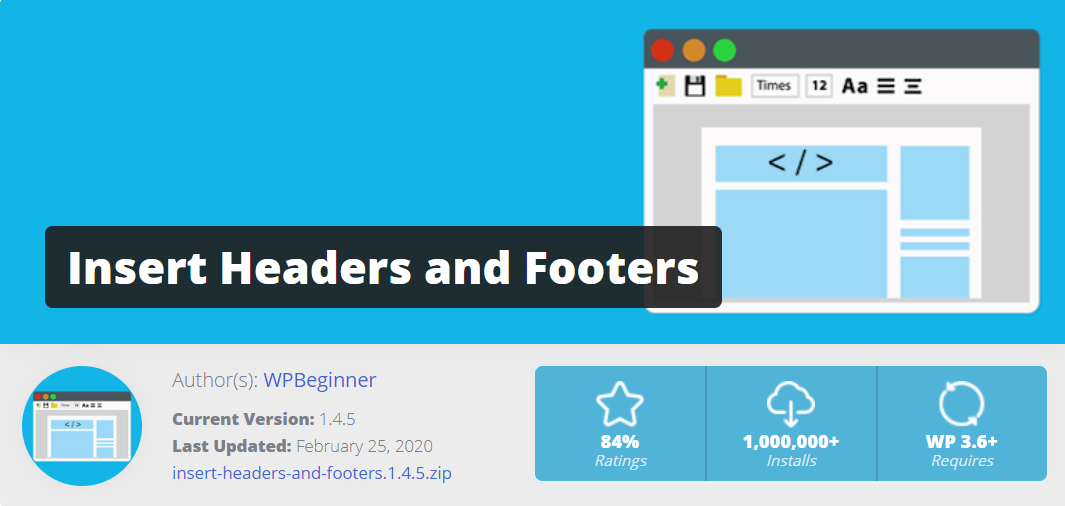
While there are a number of different ways that you can add code snippets like this to WordPress, the simplest method is a free plugin called Insert Headers and Footers:
Here’s how to add it to your WordPress site:
- Install and activate the free Insert Headers and Footers plugin
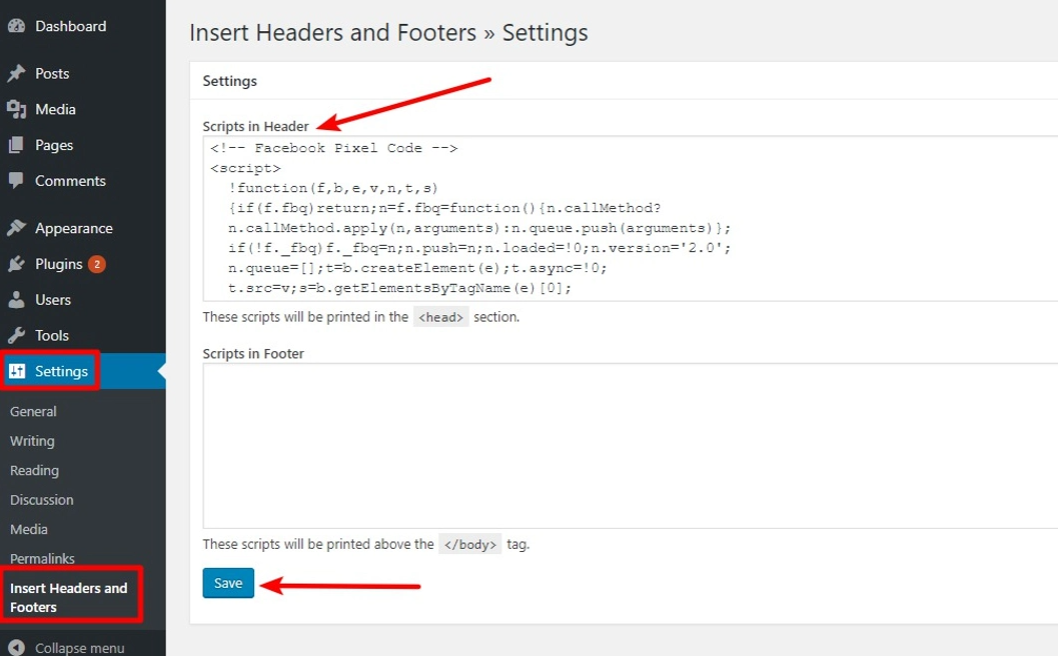
- Go to Settings → Insert Headers and Footers
- Paste the Facebook Pixel tracking code into the Scripts in Header box
- Save your changes
And there you have it, you’ve now installed the Facebook Pixel to your WordPress website or page.